
Alot of people have been asking me how to make the folded books, so I thought I would put all the tutorials on here. They are super simple, just take alot of time, but let me tell you...if you need some time to just craft and not think, this is the craft for you. Mindless and peaceful. Haha some might not think of those words...but I do. : )

- Plate hangers
- Hooks (I used adhesive ones for simple removal
- Ruler
- Paper cutter
- Adhesive (I used a scrapbook adhesive dispenser, but you can use double sided tape as well)
- Scrapbook paper

The first step with every book you fold will be to break the binding in the middle of the book. So basically that means to just open it up all the way in the middle. This gives the book more ease in the folding, and staying open flat.

This is the first book I'll show you how to make. It is super simple. I will label each fold with a step # so that you will know which fold to reference. So it's not that they go in order, but just their label.

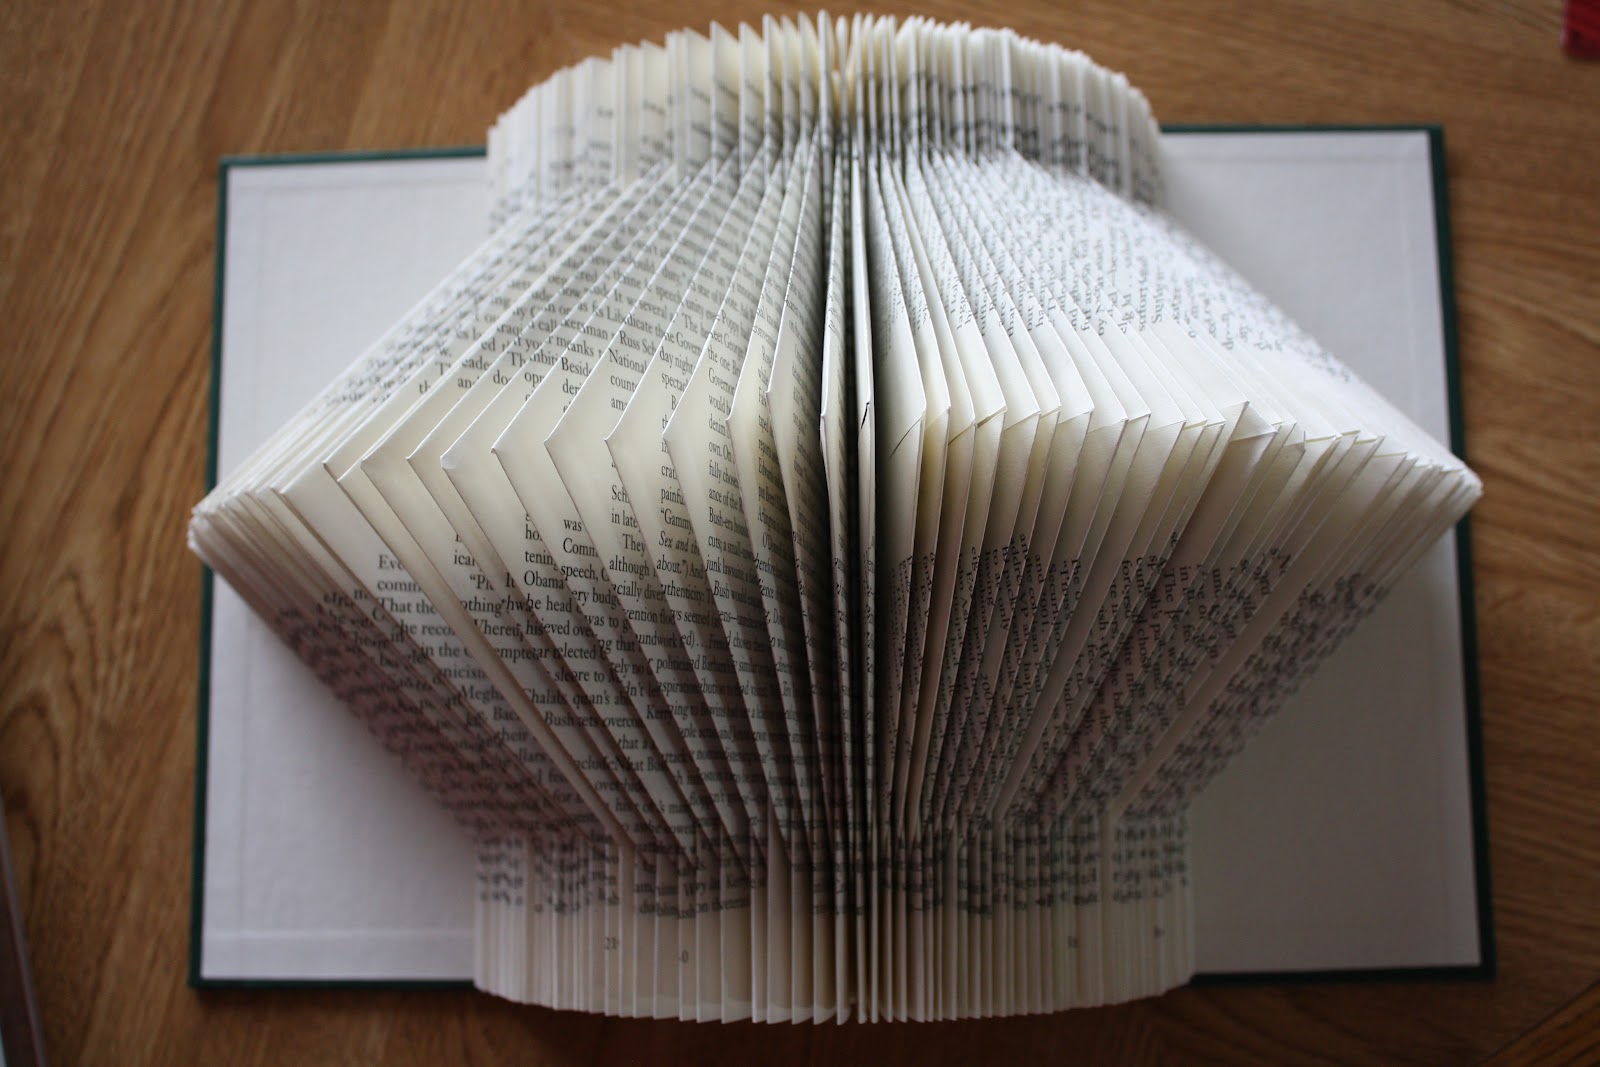
Starting in the middle of the book, where you have just broken the binding, fold the page inwards to the spine and fold down the crease.
 |
| Step 1 |
 |
| Step 2 |
You're book will end up looking like this!
For this next style you will have two new folds with the step 2 fold.

Once again, starting in the middle of the book, bring up the bottom corner up to meet in the spine. You will then fold the top corner down to meet the top of the already folded page. Repeat 10 times.
 |
| Step 3 |
Then do step 2 (folding page in half towards the spine) 10 times.
Then do the same thing as step 3, only opposite. So you bring the top corner down, and meet the bottom corner at the edge.
Then do the same thing as step 3, only opposite. So you bring the top corner down, and meet the bottom corner at the edge.
 |
| Step 4 |
Repeat step 4 10 times. Step 1 is done 10 times between each of the triangle sets.
For this next style, you will simply follow the pattern step 2, step 3, step 4 for the entire book.

And this final style you will need scissors for. Cut every page in half (cutting perpendicular to the spine).
Then fold the corner all the way to the spine.
And there you have it!

I felt like the books needed more pizzazz, so I bought some pretty scrapbook paper and simply taped it inside each cover. :)
Much better.

To hang the books on the wall in an easy way, buy plate hangars! Super easy, and then you can just use the adhesive hooks for simple removal as well.

Hang as many as you want. A whole wall would be incredible! I would LOVE to see any pictures you take of your beautiful upcycled books. :)

Happy folding!