
Alot of people have been asking me how to make the folded books, so I thought I would put all the tutorials on here. They are super simple, just take alot of time, but let me tell you...if you need some time to just craft and not think, this is the craft for you. Mindless and peaceful. Haha some might not think of those words...but I do. : )

- Plate hangers
- Hooks (I used adhesive ones for simple removal
- Ruler
- Paper cutter
- Adhesive (I used a scrapbook adhesive dispenser, but you can use double sided tape as well)
- Scrapbook paper

The first step with every book you fold will be to break the binding in the middle of the book. So basically that means to just open it up all the way in the middle. This gives the book more ease in the folding, and staying open flat.

This is the first book I'll show you how to make. It is super simple. I will label each fold with a step # so that you will know which fold to reference. So it's not that they go in order, but just their label.

Starting in the middle of the book, where you have just broken the binding, fold the page inwards to the spine and fold down the crease.
 |
| Step 1 |
 |
| Step 2 |
You're book will end up looking like this!
For this next style you will have two new folds with the step 2 fold.

Once again, starting in the middle of the book, bring up the bottom corner up to meet in the spine. You will then fold the top corner down to meet the top of the already folded page. Repeat 10 times.
 |
| Step 3 |
Then do step 2 (folding page in half towards the spine) 10 times.
Then do the same thing as step 3, only opposite. So you bring the top corner down, and meet the bottom corner at the edge.
Then do the same thing as step 3, only opposite. So you bring the top corner down, and meet the bottom corner at the edge.
 |
| Step 4 |
Repeat step 4 10 times. Step 1 is done 10 times between each of the triangle sets.
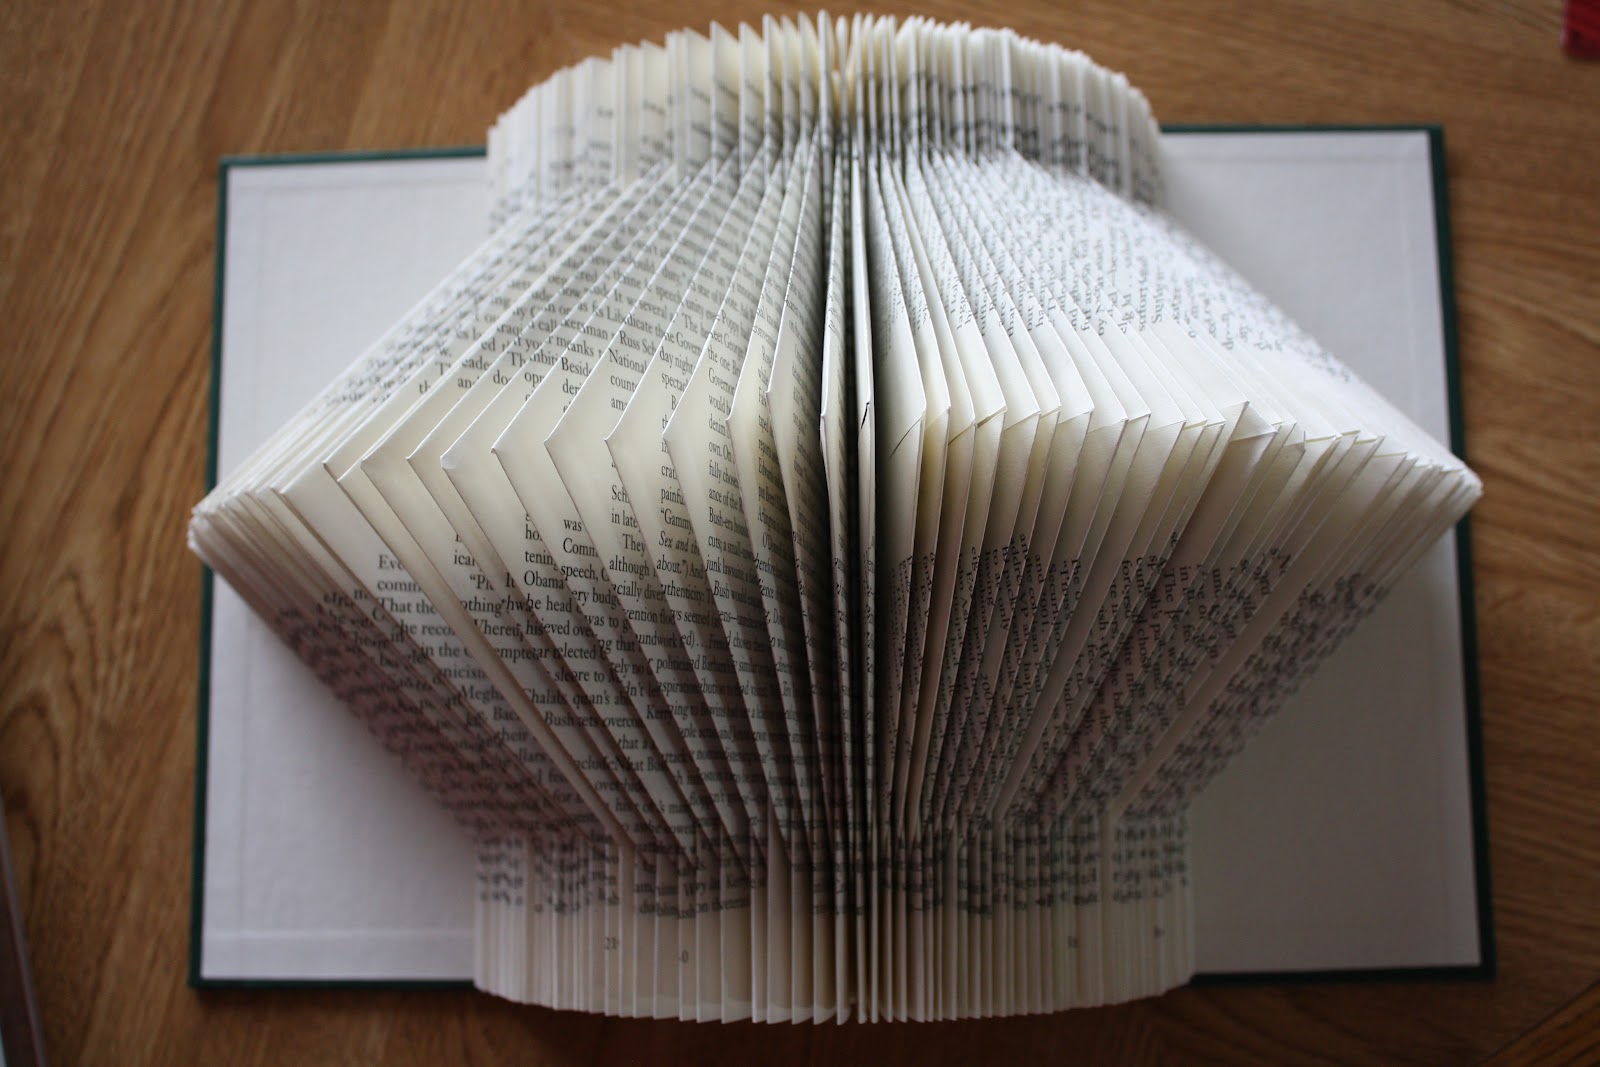
For this next style, you will simply follow the pattern step 2, step 3, step 4 for the entire book.

And this final style you will need scissors for. Cut every page in half (cutting perpendicular to the spine).
Then fold the corner all the way to the spine.
And there you have it!

I felt like the books needed more pizzazz, so I bought some pretty scrapbook paper and simply taped it inside each cover. :)
Much better.

To hang the books on the wall in an easy way, buy plate hangars! Super easy, and then you can just use the adhesive hooks for simple removal as well.

Hang as many as you want. A whole wall would be incredible! I would LOVE to see any pictures you take of your beautiful upcycled books. :)

Happy folding!
These are wonderful and look like fun to do. I'm going to try it. By any chance do you know how to fold the pages so that they end up looking like a heart?
ReplyDeletehttps://www.youtube.com/watch?v=l_ka9BXFPCQ Mira Cheryl Alt acá un tutorial en forma de corazón.
DeleteHi Cheryl! It really is fun to do! Unfortunately I have not attempted to make a heart shaped one, but I did play around with the pages to try different designs. I would start with finding the center of the book. Fold a few of the center pages with the bottom corner up a little bit, and the top corner about 1/3 of the way down. That should start you off with the middle point of the heart, and then you can gradually move the folds up/down. It really is easy once you start playing with it. Hope that helped some! Have a happy day!
ReplyDeleteGracias, muy bonito y fácil los que compartiste. El corazón es bien difícil, lo intente pero no pude, es de mucha atención y de esa poca tengo. He reutilizado mucho libro desactualizado en el camino los he cambiado totalmente, pero = han quedado lindos y me entretiene enormemente, es una gran terapia. Felicitaciones.
DeleteWhat a wonderful tutorial! I have done a little book page folding, but very simply, and your tutorial has encouraged me to experiment further.
ReplyDeleteI also love your display idea, so simple but so very clever.
thank you for all your time putting the tutorial together
Lynne
This is awesome. I have been looking for a tutorial to find out how to do letters as I want to do a book for each of my kids and my soon-to-be-born niece for Christmas. Have you figured out how to make letters yet?
ReplyDeleteHI Alaina! I haven't quite figured out the letters yet! I messed around with trying to make a big S, but it ended up just being another plain folding style.
DeleteI've got several books waiting to be folded so over the holidays I'll be working on figuring that out for you! Thanks for visiting Whimsy!
Hello again Alaina! Turns out letters are much more complicated then I thought! But here is a great link I found that offers several tips about letter patterns! Sorry to not have caught up with you before Christmas! I hope you have had a wonderful holiday!
Deletehttp://www.allthingspaper.net/2012/12/folded-book-tips-from-stephanie-pounds.html
just found some beautifully done books by someone on etsy that's selling them for almost $100! they look easy ENOUGH...but not easy...simple designs like i ♥ you, or D+F, or a cursive "love" etc...so i was looking around for how to even begin going about accomplishing this and i stumbled upon your page! and you love Jesus!!
ReplyDeletei am so blessed! i wanted to "meet" my sister in the Lord, so i had to comment :]
your work is beautiful and creative, and i love how helpful you are...and most of all how distinctly "about Jesus" you are on your page. keep at it, sis. don't be afraid.
nice to meet you :]
denae templeton
Thank you so much Denae! Your encouragement is so timely! You have no idea how your words have truly lifted my heart! May you be abundantly blessed this coming year. You are so kind! Blessings and a Happy New Year!
DeleteThis is such a fantastic tutorial with such beautiful results! Quick question: Are you using the adhesive to glue each page down after you fold it?
ReplyDeleteHi Tracy! Actually no. I only used the adhesive for the scrapbook paper to the inside panel of the book. There is no need to glue each page because the pages will be pushed against eachrher keeping each fold in place. : ) Glad you found this helpful! Happy crafting!
DeleteI would love to see how you do the one that is READ in cursif. thanks
ReplyDeleteHi Laurie,
DeleteUnfortunately, I only found pictures of that one. I have not had the time to figure it out yet. If you do, let me know! I'd love to learn!
Thank you for your tutorials: I used them to make my first folded book ever and i couldn't believe how much fun it is. Now i want to go further and try letters and numbers but I have a ...moral problem: I don't really know what books I should use to not hurt someone's feelings :).I buy the books from charity shops but some of them are fiction, i don't know if is good fiction or not. What is your advice?Madelaine
ReplyDeleteHI Madelaine!
DeleteI'm so excited you enjoyed this! I got my books from when I worked at J-Crew. They had all these books they were going to get rid of after using them in the display. I took as many as I could and have since used those.
You're such a sweet heart to be concerned about hurting other's feelings! The way I think about it is that instead of these books getting thrown away, they are being upcycled and enjoyed in a different form. I don't think you should feel bad at all about creating art from them. You obviously have a great respect for the authors and I think that that in and of itself is amazing. Don't feel bad, just go for it! Good luck! I'd love to see some pictures of your finished pieces!
I would like to know how to do this 05.04.13 in a book, can you help me?
ReplyDeleteAll the instructions are in this post. It is pretty simple once you get the hang of it. I'm sure there are other resources to help as well! If you have specific questions I can try and help you out. :)
DeleteWhat a wonderful pst. Love your folding designs.
ReplyDeleteCheers
Dr Sonia
Hi I am not understanding the last fold
ReplyDeleteJust stumbled onto your tutorial will be giving this a go
ReplyDeleteThanks for sharing
For the book cut in half, are all folds facing the same direction or do you fold towards center? Is top and bottom of cut both folded in same direction? Thank you.
ReplyDeleteThank you for the work you have put into your nice blog. We will bookmark to your blog because it is very informational. Vero Beach Tutoring
ReplyDeleteWe love the site and will come back to see your new posts.
Thanks for posting! I really like what you've acquired here; You should keep it up forever!Private tutor Alpine Best of luck
ReplyDeleteSimply fantastic!!
ReplyDeleteHi can i ask what you would call the Bookfold where each page is cut through to the spine then folded like a sand timmer please
ReplyDeleteYou made some decent points there. I looked on the internet for that problem and located most people will go in addition to with the web site.
ReplyDeletepercetakan buku online di jakarta
aqur percetakan
percetakan online Jakarta timur
jasa cetak buku murah jakarta
digital printing Jakarta timur
digital printing online timur
percetakan murah Jakarta timur
cetak murah Jakarta timur
cetak online Jakarta timur
How do I break the binding
ReplyDeleteI am new to this art. What size books do I use?? Can I use bound books also or only paperbacks?? What size would the books be so that it looks good when folded?? Is it pocket size, medium or regular paperback novel books?? Please advice. Your instructions are great. Thank you very much for introducing this art and inspiring me.
ReplyDeleteCool and I have a swell supply: Whole Home Renovation Cost modern home renovation
ReplyDelete