Showing posts with label Room Decor. Show all posts

Monday, February 4, 2013

Heart Wreath


Hello sweet friends! I hope that this first week of February has you feeling very loved. I wanted to liven up my little part of the house so I thought I would grab my favorite crafting material, paper, and have a go at a heart garland. Well as things usually go, I took one idea to the next and made myself a sweet little wreath! I like it quite alot. So here we go! 


Step 1: Cut paper into 1" strips. I used pink cardstock. The thicker the paper the sturdier your garland/wreath will be. 

Step 2: Fold all the paper strips in half.

Step 3: Take one folded strip and put inside another folded strip.

Step 4: Staple one strip over the other like so.

Step 5: Fold wings over and pinch together. Then put inside another paper strip and staple.

Step 6: Continue step 5 until you achieve the desired length.


You can do so many different things with this garland. You can hang it down over windows, doors, walls, etc. Or you can make a wreath like me! 

Wreath:  Once you get about 17 hearts, take the two ends. Push the folded end down into itself and bring the loose two ends into the fold and staple. 

When you hang your wreath, you'll need to suspend it by two strings on the left and right so that the circle keeps it shape and not hang in an oval shape. But then again you might like the oval. :)

You can also play around with words and place inside the wreath.
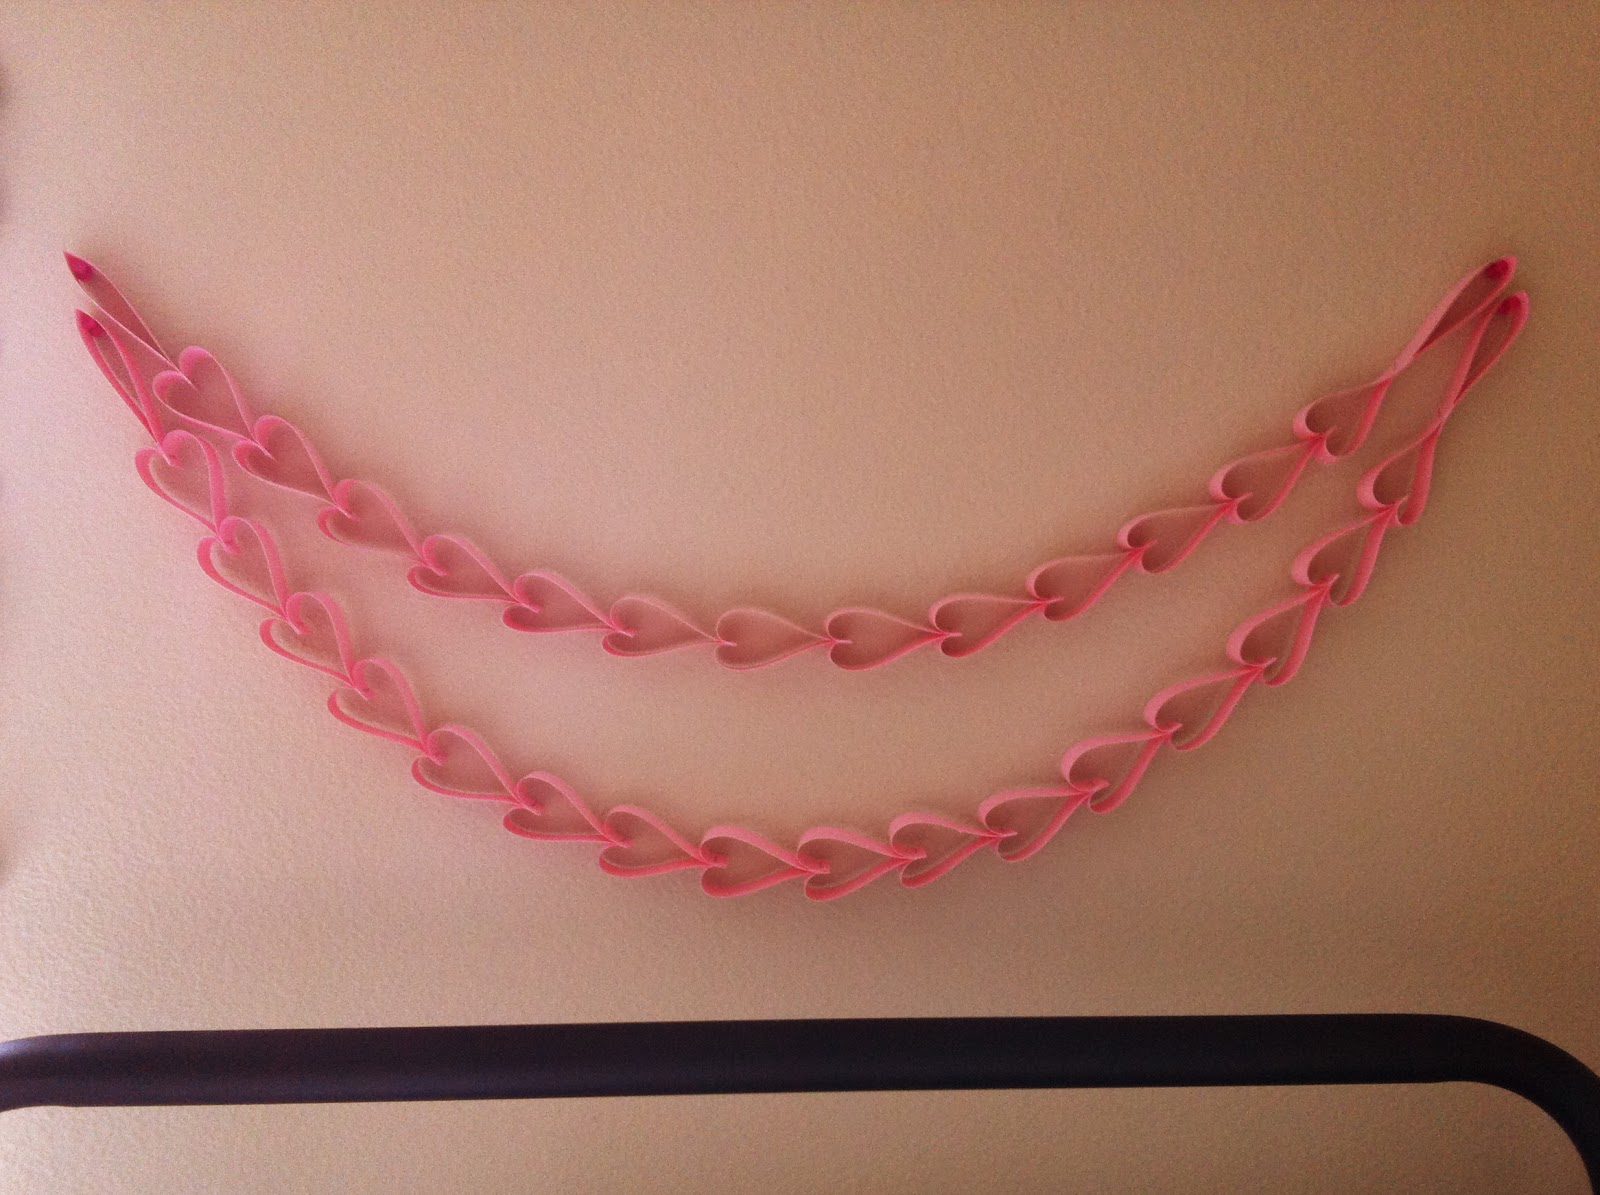
Or hang it over your bed for a little Valentine's Whimsy!

Happy Crafting!


Monday, January 14, 2013

Paper Flowers

Hello Whimsy friends!

While in college I LOVED buying flowers to brighten up my room and house. But seeing how they were so expensive (especially on a college student budget) I googled paper flowers. I settled on the  Kusudama Flower because it looked pretty easy! So here I want to give you the tutorial. 

I used some cream colored notebook paper I had left over in some used school spirals. You can use scrapbook paper, newspaper, magazines, etc. The thicker the paper however, the harder it will be to make clean crisp folds. You want to make sure to make all your folds very crisp, running your nail or folding file across each fold. 

Step 1: Cut paper into squares. I use different sizes to create a range of flower sizes. The sizes I use: 8x8, 6x6, 3x3. You really can use any size! 

 Step 2: Fold square in half, corner to corner.

Step 3: Bring right corner up to meet the top corner. 

Step 3: Repeat with left corner, to create a little diamond.

Step 4: Then take one of the flaps and fold that in half. So you'll bring the edge that meets in the middle to the outer edge. 

Step 4: Repeat with left side.

Step 5: Now you will open the folded flap, opening it and then pressing it flat. 

Step 5 continued

Step 5 continued

Step 5: Repeat with the left side.

Step 6: Fold the tops of the flattened flaps down. 

Step 7: Then fold that piece in half. 

Step 7: Repeat with left side. 

Step 8: Pull the two sides together and tape. (Or you can glue them together, whichever you prefer. Taping is so much easier, plus it will be hidden so that I why I prefer using tape.) 
Now you have one petal! 

Step 9: Repeat all of the above steps 5 times to get 5 petals. 


Step 10: Glue all petals together on the sides. I use hot glue because it is quick and holds them together the best. 

Woohoo! Now to admire your beautiful flower! It's ok if it takes a couple tries, you'll get the hang of it and soon enough have an entire bouquet worth! 

I wanted to put them in a bottle/vase so I glued the pieces around a skinny wooden dowel rod.  
(As shown below).

These were glued around the dowel rode, so they stood straight up, but then I wanted some to face outward so I just put a steam of glue on the side of the flower and glued them this way. 
(As seen below). 


And voila! You have a beautiful bouquet of paper flowers! Cheap, easy to maintain ;), and they never die! I hope that you enjoy your flowers as much as I have!  My new project is to create a garland by stringing the flowers along cute twine. Look for that project soon. 
Many blessings, and happy crafting! 


Sunday, February 26, 2012

Book Art

Hello friends,
I hope that you are doing well and enjoying this early spring weather. I have quite a treat to share with you! I first discovered this craft in a window display. At the time, I worked at J-Crew and they happened to be using alot of books for display. I asked my manager if I could perhaps show him a cool display idea I had seen. He allowed me to use a few of the books and I began folding the pages. He loved the look and we actually got to use them in the display! 

 I was able to get all the books they had laying around in the store because they are closing down that location. So I thought I would make some use of them. You can always mess around and try to figure out new patterns. It takes a long time, but I think they are worth it.  What do you think? 


Well there you have it! You can view the tutorials for each of these patterns on this next blog: http://awhimsywillow.blogspot.com/2012/03/book-art-tutorial.html


Friday, January 27, 2012

Craft Craving

Hello whimsy friends!

I hope this day finds you overflowing with joy and rest. It is a beautiful day outside my window, a perfect 69〫...in January!!! Even the trees on campus are blossoming...I think they are confused just like the rest of us! Maybe we really did skip winter? Hmmm...That's ok with me! : )

After a crazy week, I was craving some time to just stop thinking and create something. I had a vase of flowers and convinced myself I would buy some beautiful fresh flowers ever week....ya that lasted long. Not. : ) I was soon reminded how expensive flowers are, sadly.  I decided to make some flowers myself. Yup, just make it yourself. I think that has become my motto over the past few years. I see things I love and then I see the price... it usually sounds like this, "SHEESH! Are you serious? I'll just make this myself." 

So I searched a while online, and with the help of my best friend Pinterest, I found these lovelies! The tutorial is great and super easy to follow! They aren't as difficult as you would think. : ) And voila...

I had a Snapple bottle that I had painted turquoise, so I just put them in that to add a bit of color. Snapple bottles are SUPER cute because they have a whimsy little "S" engraved in the glass (you should look next time ; )
So there you have the lovely $$$ saver! I still think I'll buy real flowers every now and then...but I love my paper ones. So easy to take care of! 
Next I had my eye on all my random jars/bottles. Yes...I collect glass bottles and jars whenever I find them, they're free after all! (Well are you paying for the drink or the bottle? or both?) 
Saves the planet anyway, recycle! 
I decided I would wrap them! Here is the before and after:

All you do is dap a bit of hot glue at the top under the lip of the bottle and start wrapping! The curves get tricky, but you'll get the hang of it. You can add a dot of hot glue every now and then if the string tries to move. It is best to start from the top and go down. And then just finish it off with a dab of hot glue on the bottom!


You can play around with different designs/yarns/string. Baker's twine is my next choice of string. Obviously the thicker the string being used the quicker it goes. try out different thicknesses, and let me know how they turn out! 

Have fun! And be blessed! We serve a marvelous God! 

Saturday, July 2, 2011

Patriotic Party

One of my favorite holidays is just two days away, and though I'm busy I couldn't help but notice so many wonderful ideas for this festive time of the year. With red, blue, and white everywhere you can't help but get in the mood. So if you're feelin' crafty and have some time this weekend, I found some super cute ideas for you to try!
The first comes from our dear Martha Stewart herself.  Her company is one of my absolute favorites. I saw this on the front of her latest magazine issue and just about died in the grocery store so thrilled by the idea. This is genius, and I wish so badly I had the chance to try it out, but hopefully next year! May I present to you Fireworks Cookies 
Courtesy MarthaStewart.com
They are based on the simple sugar cookie, but given pizzazz with simple icing that is watered down a bit to make it easier to decorate the fireworks with. These cookies will make any party exciting and will for sure be a huge hit with all your guests.

And who would I be if I didn't write about cupcakes? I found a wonderful blog by Winnie Abramson, where she applies the same method with cupcakes!  Firework Cupcakes Love it!

Courtesy Countryliving.com
Now for a simple, adorable craft idea that will brighten up your mantle, window, or door frame. It comes from Country Living Magazine (One of my favorites).                                  This garland can be made from simple construction paper and newspaper, or simply whatever paper you have.   The link shows you how to make it quick and easy! Happy 4th Garland
This idea can be applied for any holiday or celebration event. Everyone loves the little touches to decorations, and who says you have to go out and buy them! Making your own decorations is often alot cheaper, and usually are a bigger hit than any bought decor. : )

Hope you have a wonderful safe 4th of July!
Happy Fireworks!