Showing posts with label Holiday. Show all posts

Tuesday, February 12, 2013

Heart Pockets

Alright, a day late, but sure enough here is the Valentine's Day paper craft I promised. It is so cute, and super easy. Here's the How-to and I hope you have a fabulous Valentine's Day.

These are perfect to create a cute wall design, or to simply write a note and place in. You could even stick them on a gift. Scrapbook paper or thinner is best. Cardstock will be difficult to fold. The crisper your folds the better. I use a bone folder to make the edges crisp.

STEP 1: Cut out a rectangle. A good size that I use is 5.5" x 3". You can always trim to size during step 5. 

STEP 2: Fold in half. (Hot dog style ;) 

STEP 3: Fold in half again, only this time hamburger style. 


STEP 4: Fold one side up to meet the center fold. 
(Unlike how I did it, make sure the folded edge is at the top.)

STEP 5: Repeat with other side. This is the step where you can trim the top to make sure it looks proportional. 

STEP 6: Fold down corners to the back.

STEP 7: Repeat on other side. Tape back. 

Ta-dah! 

Now the fun part of finding little trinkets and special things to put in the pockets!


I covered my closet door with the hearts. 

Happy Crafting! 
P.S. If you like this craft, Pin it! 

Monday, February 4, 2013

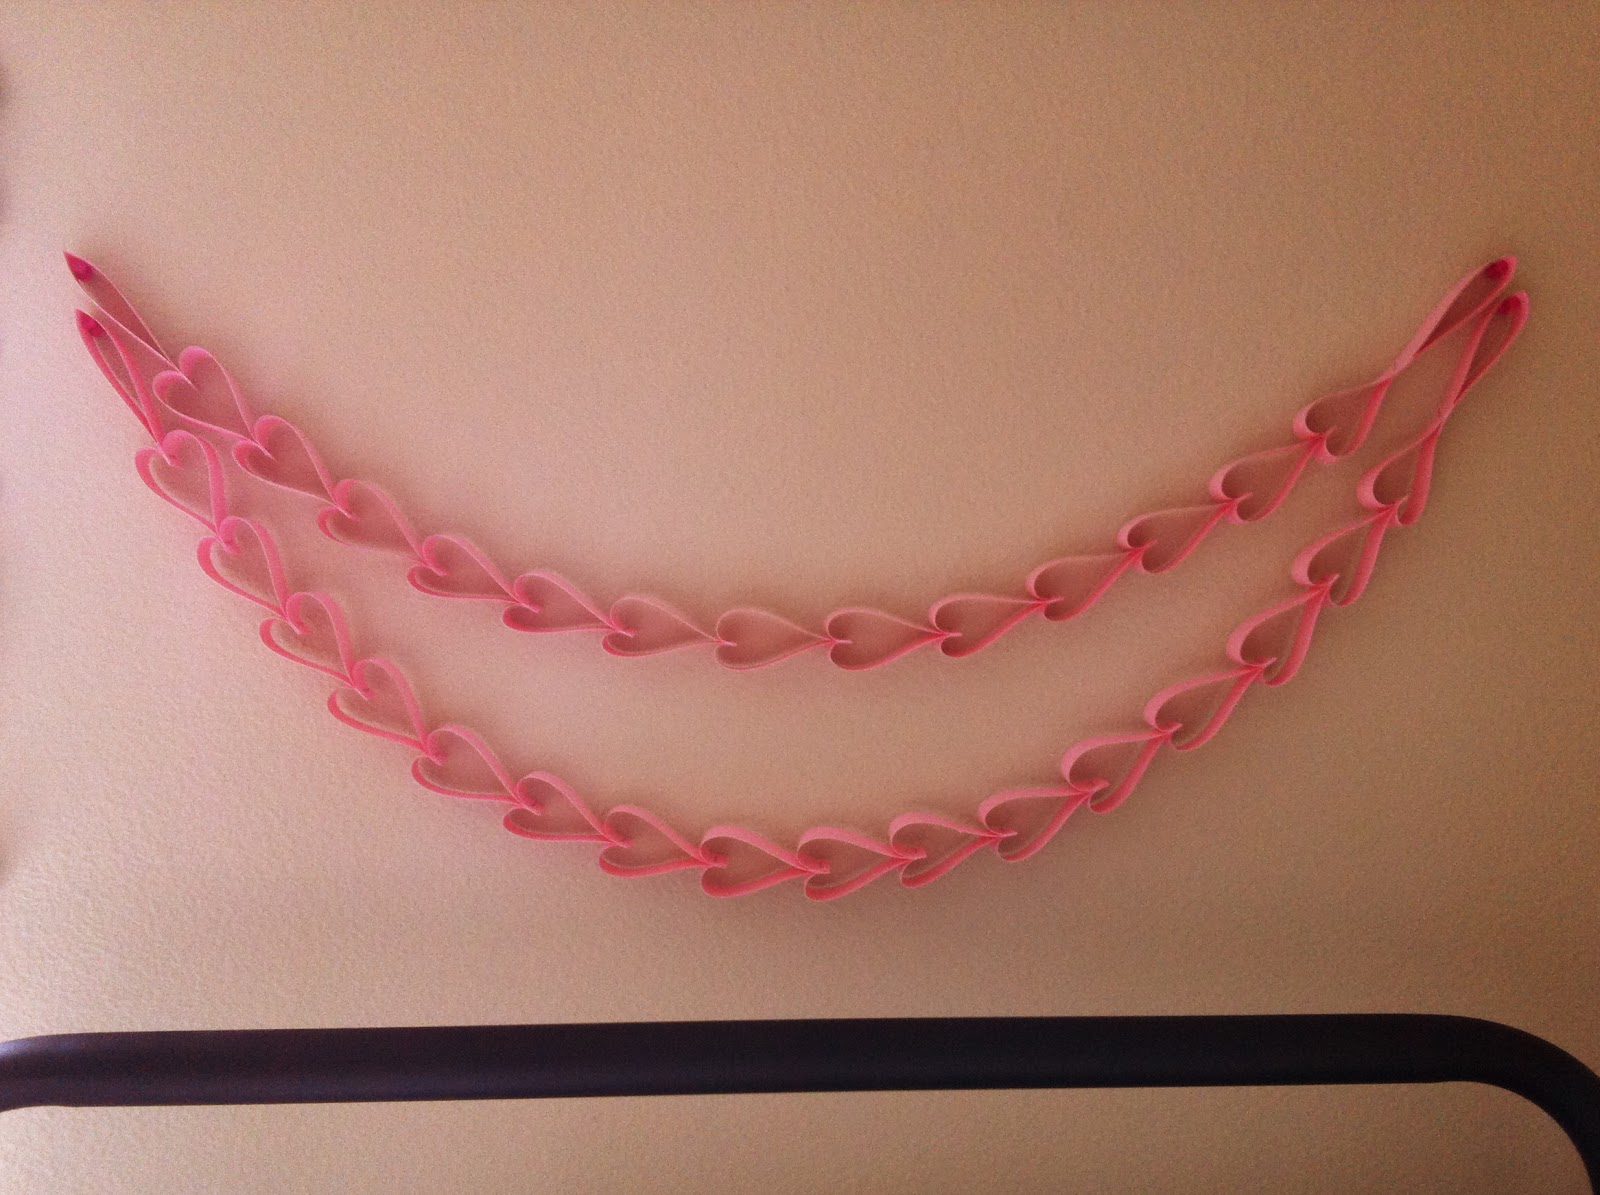
Heart Wreath


Hello sweet friends! I hope that this first week of February has you feeling very loved. I wanted to liven up my little part of the house so I thought I would grab my favorite crafting material, paper, and have a go at a heart garland. Well as things usually go, I took one idea to the next and made myself a sweet little wreath! I like it quite alot. So here we go! 


Step 1: Cut paper into 1" strips. I used pink cardstock. The thicker the paper the sturdier your garland/wreath will be. 

Step 2: Fold all the paper strips in half.

Step 3: Take one folded strip and put inside another folded strip.

Step 4: Staple one strip over the other like so.

Step 5: Fold wings over and pinch together. Then put inside another paper strip and staple.

Step 6: Continue step 5 until you achieve the desired length.


You can do so many different things with this garland. You can hang it down over windows, doors, walls, etc. Or you can make a wreath like me! 

Wreath:  Once you get about 17 hearts, take the two ends. Push the folded end down into itself and bring the loose two ends into the fold and staple. 

When you hang your wreath, you'll need to suspend it by two strings on the left and right so that the circle keeps it shape and not hang in an oval shape. But then again you might like the oval. :)

You can also play around with words and place inside the wreath.

Or hang it over your bed for a little Valentine's Whimsy!

Happy Crafting!


Thursday, December 27, 2012

Cupcake Stencils

Last year as I walked the lovely aisles of Crate and Barrel I came upon... cupcake stencils. !!!!!

You can only imagine my absolute joy. I had never even thought to make stencils, and yet lo and behold Crate and Barrel has come up with some for every season. 


In love.
I bought the Christmas ones last year after Christmas, but I finally got to put them to use this year!  

They are so adorable and cute, but they do not work well with sprinkles (look below at lemon cookie decorations). I had to use cinnamon (which can be a little strong) to get the image clearly on the cupcake and cookies.  They were absolutely beautiful though when they did work, as on the Snickerdoodle Cupcakes. 


wah wah...

Overall I think they are a super cute idea. I just need to figure out how to better use them. :)

Hope you have had a very Merry Christmas!

Cookies and Christmas

Hello friends!

So let's get right to it! Cookie time! My brother came home from college and asked...well demanded...some gingerbread men cookies. This caught me quite off guard because never have I had this requested from anyone in my family...but you can bet I was on top of it!

I loved this recipe and will now share it with you! Also, I found this delicious recipe for sugar cookies which were also requested this happy holiday season. So here are the two recipes for the cookies and also my icing recipe.


Sugar Cookies
I recruited my younger brothers to decorate ;)
Ingredients
1 cup real butter (no substitutions!) at room temperature
1 cup sugar
1 egg (make sure to use a large or extra large egg)
1 1/2 teaspoon almond extract (or other flavor of your choice, like vanilla)
3 C flour, lightly spooned into measuring cups and leveled (don’t scoop it!)
1 1/2 teaspoon baking powder
1/2 teaspoon salt


Directions
Cream butter and sugar until light and fluffy- about 2 minutes. Add in egg and extract and mix to incorporate.
In a separate bowl combine flour, baking powder and salt.  A very important note: It’s important to correctly measure your flour or you will end up with a dry, crumbly dough. Never, ever use your measuring cup to scoop up the flour.  Use a regular sized spoon and spoon the flour into the cup and then level it off with a knife.
 Slowly add the flour mixture to the butter mixture and mix until completely combined.
Chill the dough in the fridge for about an hour, or use this great tip to make things easier:
When your dough is made, instead of putting it in the fridge, immediately roll  between 2 sheets of waxed or parchment paper and then place on a flat surface in the fridge.  Chill for about 20-30 minutes and then start cutting it out.  This way it chills faster and the bonus is that you don’t need to add extra flour to roll it out.  If you don’t use this tip, proceed as follows:
When you’re ready to roll out dough lightly sprinkle flour onto your work surface and roll out dough with a rolling pin.

Bake at 350 for 8-12 minutes. The baking time really depends on how you like them. If you like themreally and slightly chewy, about 8-9 minutes does it. If you like them slightly crisp and buttery, then go for 10-12.

Gingerbread Men Cookies
Ingredients
Little Bandit lost his legs as punishment for his crimes
  • 6 cups all-purpose flour
  • 1 teaspoon baking soda
  • 1/2 teaspoon baking powder
  • 1 cup (2 sticks) unsalted butter
  • 1 cup Truvia Baking Blend
  • 4 teaspoons ground ginger
  • 4 teaspoons ground cinnamon
  • 1 1/2 teaspoons ground cloves
  • 1 teaspoon finely ground pepper
  • 1 1/2 teaspoons coarse salt
  • 2 large eggs
  • 1 cup unsulfured molasses
  • Royal Icing
  • Sanding sugar, for decorating (optional)
  • Candy, for decorating (optional)

Directions

  1. Whisk together flour, baking soda, and baking powder in a large bowl. Set aside.
  2. Place butter and Truvia in the bowl of an electric mixer fitted with the paddle attachment, mix on medium speed until fluffy. Mix in spices and salt, then eggs and molasses. Reduce speed to low. Add flour mixture, mix until just combined. Divide dough into thirds, wrap each in plastic wrap. Refrigerate until cold, about 1 hour.
  3. Line baking sheets with nonstick baking mats; set aside. Roll out dough on a clean work surface to 1/4-inch thick. Using a 4-inch gingerbread man-shaped cookie cutter, cut out cookies, and place on a baking sheet, at least 1 inch apart. Refrigerate until cold, about 30 minutes.
  4. Preheat oven to 350 degrees. Bake cookies until crisp but not dark, 10 to 12 minutes. Let cool on sheets on wire rack.
  5. Using white icing in a squeeze bottle, decorate gingerbread men, as desired. While still wet, sprinkle with sanding sugar; let dry 10 minutes. Shake off excess sugar. Using additional icing, attach candy, using craft tweezers. Let dry completely 8 hours or overnight.  {Credit to Dani Fiori}

    Two of my loves: Trees and squirrels 
    Icing:
    Royal Icing
    1 Cup powdered sugar
    1 1/2 Tbsp milk
    1 tsp vanilla (I like to always add a little more :)
    The Gingerbread Hospital


Monday, October 10, 2011

So Easy a Pumpkin Could Do it!

In the spirit of fall, not of halloween (I dislike halloween, but that's another story!) I decided to make some pumpkin muffins! Granted, I was led to when I saw how easy this recipe was. I was highly skeptical that something so simple could really be delicious. Well, I stand corrected. THEY ARE DELICIOUS! And so easy a toddler can make them!

A friend found the recipe on the ever-so-addicting Pinterest. (You can follow me on Pinterest here.) P.S. I have limited myself to 10 min max a day on it because it is a bit too addicting. I realized how many other things I could have been doing, that are bit more worthwhile! Oops, did I just say that? yes. yes i did. I challenge you to limit yourself on Pinterest, or on the computer all together. Go for a walk, or here's a novel idea! Bake something! Ok. Preaching over. : )

Now to the Pumpkin! 

Ingredients:
1 box of Classic Yellow Cake Mix
1 15 oz can of Pumpkin Pie Mix
Yes, that is all. No eggs, water, oil, nada!
Mix together cake mix and pumpkin. 
Set oven to 325〫

I like to use an ice cream scoop, but when I do not have one around I use a small spoon.
Place dough by rounded spoonfuls into cupcake liners. Fill liners depending on the desired size of muffins. I like to fill them about 1/2 full, but this dough does not rise as much as other recipes so feel free to add a bit more than usual. 

(I apologize for the poor picture quality. I do not have the best lighting in my house at college :)

Bake muffins for 20-25 minutes. The muffins should bounce back when touched.

And there you have it! Delicious and perfect-for-fall Pumpkin muffins!  I like to top mine off with a sprinkle of powdered sugar. It gives them a sweet little touch.

So here's to scrumptious easy recipes! 
Happy baking!

Monday, July 4, 2011

Happy 4th!

Alright, I couldn't help myself. I had to bake something for this holiday weekend! Plus I had a fun reason to after making these cute decorations.
I decided on my Key Lime Cupcakes, for a summery flavor.  The decorations are made out of sturdy cardstock, using some of my mom's scrapbook tools.  I look forward to making more of them for special occasions. And maybe even selling them on the upcoming Whimsy Willow Etsy shop! The shop should be up and running around July 15th!


I hope you have a blessed 4th of July! Thank you Lord for a country of freedom. ❤